Contact us : contact@digitechgenai.com


Introduction
In this case study, we’ll build a simple e-commerce platform using cloud native development with Spring Boot principles. Our goal is to create a scalable, resilient, and efficient application that can handle high traffic and provide a seamless user experience.
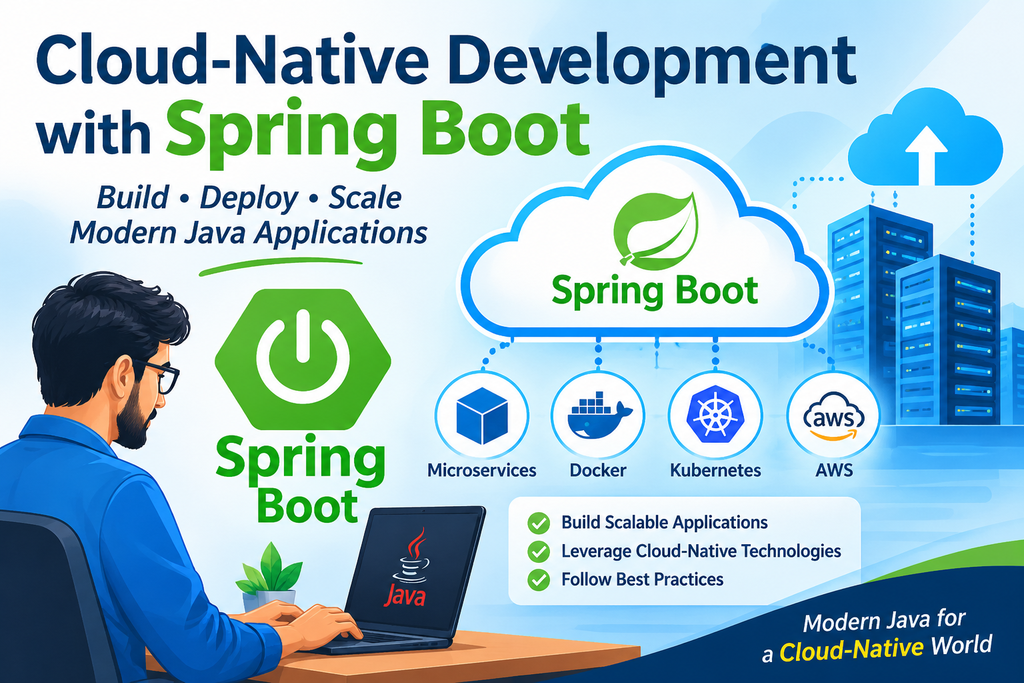
Benefits of Cloud-Native Development with Spring Boot
Cloud-native development with Spring Boot offers several advantages for organizations building modern Java applications. By combining Spring Boot with cloud infrastructure and microservices architecture, developers can create applications that are easier to maintain, deploy, and scale.
1. Improved Application Scalability
Spring Boot applications can be deployed as independent microservices, allowing individual components to scale according to business requirements. Kubernetes can automatically adjust the number of application instances based on resource utilization and configured scaling policies.
2. Faster Application Deployment
Cloud-native development supports automated CI/CD pipelines. Developers can build, test, package, and deploy Spring Boot applications with minimal manual intervention.
3. Better Fault Tolerance
Distributed applications must be designed to handle service failures. Spring Boot applications can implement timeouts, retries, circuit breakers, and fallback mechanisms to improve system resilience.
4. Platform Independence
Docker containers package applications with their runtime dependencies. This makes it easier to run Spring Boot applications consistently across development, testing, staging, and production environments.
5. Improved Monitoring and Observability
Spring Boot Actuator provides production-ready endpoints for application health and metrics. Combined with centralized logging, distributed tracing, and monitoring platforms, development teams can identify performance issues more efficiently.
Essential Technologies for Spring Boot Cloud-Native Applications
A successful cloud-native Java application often combines several technologies:
| Technology | Purpose |
|---|---|
| Spring Boot | Develop production-ready Java applications |
| Spring Cloud | Support distributed application patterns |
| Docker | Package applications into containers |
| Kubernetes | Orchestrate and scale containers |
| Apache Kafka | Enable event-driven communication |
| Spring Cloud Gateway | Manage API routing |
| Spring Boot Actuator | Monitor application health and metrics |
| Prometheus and Grafana | Collect and visualize monitoring data |
| AWS, Azure or Google Cloud | Provide cloud infrastructure |
Choosing the right technology depends on application complexity, scalability requirements, infrastructure, and operational needs.
Best Practices for Cloud-Native Development with Spring Boot
Building a cloud-native application requires more than deploying a Spring Boot JAR file to a cloud server. Developers should follow established architectural and operational practices.
1. Follow Microservices Design Principles
Break large applications into independently deployable services based on business capabilities. Avoid creating unnecessary microservices that increase operational complexity.
2. Externalize Application Configuration
Keep environment-specific configuration outside application code. Use environment variables, secure configuration services, or managed secrets.
3. Implement Centralized Logging
Collect logs from different microservices in a centralized platform. Include correlation IDs or trace IDs to simplify troubleshooting across distributed requests.
4. Secure REST APIs
Use Spring Security, OAuth 2.0, and JWT-based authentication where appropriate. Apply role-based authorization and secure communication between services.
5. Automate Testing and Deployment
Implement CI/CD pipelines with automated unit tests, integration tests, security scanning, and deployment validation.
6. Design for Failure
Distributed systems experience network interruptions, service unavailability, and unexpected timeouts. Implement appropriate timeouts, controlled retries, circuit breakers, and graceful degradation.
7. Monitor Application Performance
Use Spring Boot Actuator, Micrometer, Prometheus, and Grafana to monitor application health, JVM metrics, response times, and resource consumption.
Real-World Use Cases of Spring Boot Cloud-Native Development
Cloud-native Spring Boot applications are useful across several industries.
- E-commerce: Independent product, inventory, order, and payment services.
- Banking: Account management, transaction processing, and customer services.
- Healthcare: Patient management, appointment scheduling, and integration services.
- Telecommunications: Customer management, billing, and usage-processing services.
- Enterprise applications: Distributed business workflows, reporting, and integration platforms.
For example, an e-commerce platform can use Spring Boot microservices to manage products, orders, inventory, and customer accounts independently. Docker packages each service, while Kubernetes manages deployment and scaling.
Components of the E-commerce Platform
The platform will have several microservices, each responsible for a specific functionality:
- Product Service: Manages product information and inventory.
- Order Service: Handles order creation, processing, and tracking.
- Payment Service: Manages payment processing and transactions.
- User Service: Handles user registration, authentication, and profile management.
Step 1: Setting Up the Product Service
Let’s start by setting up the Product Service, which will manage product information. We’ll use Spring Boot to create this microservice.
- Create a Spring Boot Project: Use Spring Initializr (https://start.spring.io) to create a new Spring Boot project with the following dependencies:
- Spring Web
- Spring Data JPA
- H2 Database (for simplicity)
- Spring Boot Actuator
- Define the Product Entity: Create an entity
Productto represent the product information.
@Entity
public class Product {
    @Id
    @GeneratedValue(strategy = GenerationType.IDENTITY)
    private Long id;
    private String name;
    private String description;
    private Double price;

    // Getters and Setters
}
3. Create the Product Repository: Create an interface ProductRepository to handle CRUD operations.
@Repository
public interface ProductRepository extends JpaRepository<Product, Long> {
}
4. Develop the Product Service: Create a Product Service class to manage business logic.
@Service
public class ProductService {

    @Autowired
    private ProductRepository productRepository;

    public List<Product> getAllProducts() {
        return productRepository.findAll();
    }

    public Product addProduct(Product product) {
        return productRepository.save(product);
    }

    public Optional<Product> getProductById(Long id) {
        return productRepository.findById(id);
    }

    public void deleteProduct(Long id) {
        productRepository.deleteById(id);
    }
}
5. Build the REST Controller: Create a ProductController class to expose REST APIs.
@RestController
@RequestMapping("/products")
public class ProductController {

    @Autowired
    private ProductService productService;

    @GetMapping
    public List<Product> getAllProducts() {
        return productService.getAllProducts();
    }

    @PostMapping
    public Product addProduct(@RequestBody Product product) {
        return productService.addProduct(product);
    }

    @GetMapping("/{id}")
    public Product getProductById(@PathVariable Long id) {
        return productService.getProductById(id).orElse(null);
    }

    @DeleteMapping("/{id}")
    public void deleteProduct(@PathVariable Long id) {
        productService.deleteProduct(id);
    }
}
6. Run the Application: Run the application and test the endpoints using Postman or any other API testing tool
Step 2: Implementing Service Discovery with Eureka
Service discovery is one of the major components of cloud native development with Spring Boot. Service discovery helps microservices find each other. We’ll use Netflix Eureka for this purpose.
- Create a Eureka Server: Use Spring Initializr to create a new Spring Boot project with the Eureka Server dependency. Add the following configuration to
application.properties:
spring.application.name=eureka-server
server.port=8761
eureka.client.register-with-eureka=false
eureka.client.fetch-registry=false
Annotate the main application class with.@EnableEurekaServer
@SpringBootApplication
@EnableEurekaServer
public class EurekaServerApplication {
    public static void main(String[] args) {
        SpringApplication.run(EurekaServerApplication.class, args);
    }
}
2. Register Product Service with Eureka: Add the Eureka Client dependency to the Product Service project and configure it in application.properties:
spring.application.name=product-service
eureka.client.serviceUrl.defaultZone=http://localhost:8761/eureka/
Annotate the main application class with @EnableEurekaClient
@SpringBootApplication
@EnableEurekaClient
public class ProductServiceApplication {
    public static void main(String[] args) {
        SpringApplication.run(ProductServiceApplication.class, args);
    }
}
Step 3: Centralized Configuration with Spring Cloud Config
Under cloud-native development with Spring Boot another important component Centralised configuration is essential for managing multiple microservices.
- Create a Config Server: Use Spring Initializr to create a new Spring Boot project with the Spring Cloud Config Server dependency. Configure
application.properties:
spring.cloud.config.server.git.uri=https://github.com/your-config-repoAnnotate the main application class with @EnableConfigServer
@SpringBootApplication
@EnableConfigServer
public class ConfigServerApplication {
    public static void main(String[] args) {
        SpringApplication.run(ConfigServerApplication.class, args);
    }
}
2. Configure Product Service: Add the Spring Cloud Config dependency to the Product Service project and configure it in application.properties:
spring.cloud.config.uri=http://localhost:8888Create a bootstrap.properties file for environment-specific configurations.
Step 4: Distributed Tracing with Spring Cloud Sleuth and Zipkin
Distributed tracing helps monitor and troubleshoot microservices under cloud-native development.
- Add Sleuth and Zipkin Dependencies: Add the Spring Cloud Sleuth and Zipkin dependencies to the Product Service project.
- Configure Tracing: Configure the tracing properties in
application.properties:
spring.zipkin.base-url=http://localhost:9411
spring.sleuth.sampler.probability=1.0
Step 5: Containerizing with Docker and Orchestrating with Kubernetes
Docker and Kubernetes help deploy and manage cloud-native applications.
- Create a Dockerfile: Create a
Dockerfilefor the Product Service application.
FROM openjdk:11-jre-slim
VOLUME /tmp
COPY target/product-service-0.0.1-SNAPSHOT.jar app.jar
ENTRYPOINT ["java","-jar","/app.jar"]
2. Build and Run Docker Image: Build and run the Docker image.
docker build -t product-service .
docker run -p 8080:8080 product-service
3. Create Kubernetes Deployment: Create a Kubernetes deployment and service file for the Product Service.
apiVersion: apps/v1
kind: Deployment
metadata:
  name: product-service
spec:
  replicas: 3
  selector:
    matchLabels:
      app: product-service
  template:
    metadata:
      labels:
        app: product-service
    spec:
      containers:
      - name: product-service
        image: product-service:latest
        ports:
        - containerPort: 8080

---

apiVersion: v1
kind: Service
metadata:
  name: product-service
spec:
  selector:
    app: product-service
  ports:
  - protocol: TCP
    port: 80
    targetPort: 8080
  type: LoadBalancer
4. Deploy to Kubernetes: Deploy the product service to Kubernetes.
kubectl apply -f deployment.yaml
kubectl apply -f service.yaml
To Read more spring boots, click here.
Conclusion
By following these steps, we’ve set up a simple e-commerce platform using Spring Boot and cloud-native development principles. We created a product service, implemented service discovery with Eureka, centralized configuration with Spring Cloud Config, distributed tracing with Spring Cloud Sleuth and Zipkin, and containerized and orchestrated the application with Docker and Kubernetes. This approach ensures scalability, resilience, and efficiency for modern applications.
To know more about the courses, refer to : Courses